
A deep toothache has a way of stopping your focus and making every small task feel harder than it should. Once this type of pain starts to interfere with meals, sleep, or day-to-day comfort, it usually means the problem sits inside the tooth rather than on the surface. At that point, simple fixes no longer help, and a more precise treatment becomes necessary.
This is where a dentist Maple Ridge steps in with a clear plan that targets the source of the pain. Their evaluation shows how far the infection has moved and whether the nerve can still recover. You gain clear direction and a sense of relief once the cause becomes known. With that information, the next steps feel less uncertain and far more manageable.
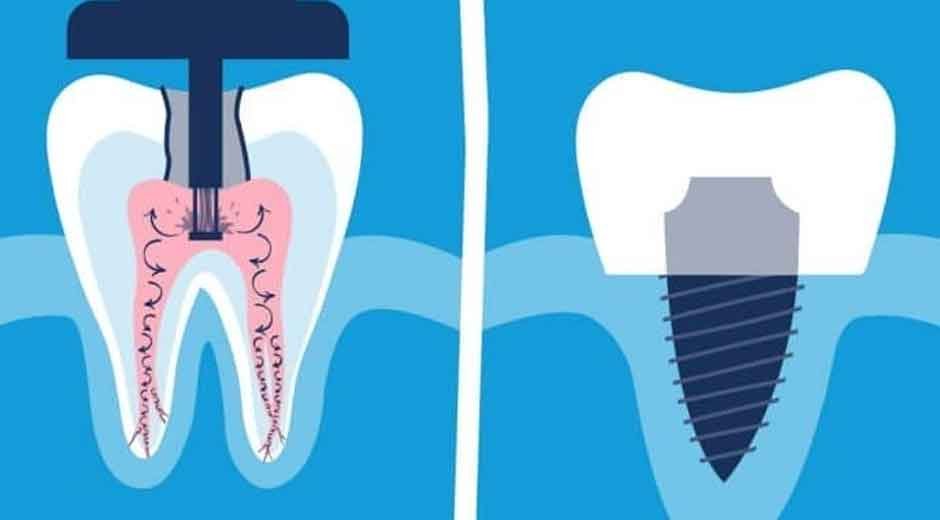
Step 1: Diagnosis and Treatment Plan
A dentist in Maple Ridge will start by locating the root of the problem. X-rays show the depth of the decay and any changes in the bone. Pressure tests and warmth checks confirm that the pulp inside the tooth can no longer recover. Once these signs appear together, a root canal becomes the clear choice.
A brief explanation of the process follows. You learn how the dentist will clear the infection, stabilize the roots, and restore the tooth. This reduces stress and answers important questions.
Step 2: Numbing and Preparation
Comfort takes priority before any work begins. The Maple Ridge dentist numbs the tooth and the nearby gum until the area responds fully. You feel pressure during the procedure, but not pain. The dentist checks the numbness several times before continuing. Next, the tooth is isolated. This keeps saliva away and creates a clean space for treatment.
Step 3: Removal of the Inner Pulp
A small opening is made at the top of the tooth. This gives access to the damaged pulp inside the root. The dentist removes the inflamed tissue with precise tools. As the pulp leaves the chamber, the cause of the pain disappears as well.
The canals inside the roots are then shaped. This allows them to hold the sealing material later. The shaping also removes hidden debris. By the end of this stage, the tooth becomes free of harmful bacteria.
Step 4: Cleaning and Sealing of the Canals
Once the canals are open, they must be cleaned fully. A disinfecting solution clears any remaining particles. This step protects the bone and keeps bacteria from returning. The canals must be spotless before the final seal.
A special filling material is placed inside the roots. It strengthens the inner structure and prevents future infection. Your dentist in Maple Ridge seals the top opening with a temporary or permanent filling. This protects the tooth as it heals.
Step 5: Placement of the Final Crown
A crown restores the tooth once the root canal is complete. The procedure leaves the outer structure weaker than before, so the crown adds strength and stability. It also brings back the proper shape for chewing. Without a crown, the tooth would remain vulnerable.
A dentist in Maple Ridge chooses a crown that matches the shade of your natural teeth. This creates a smooth and comfortable fit. Once the crown is placed, the tooth returns to normal function. It feels stable, secure, and ready for daily use.
Root canal therapy in Maple Ridge follows a clear process that repairs the tooth and stops deep pain. Each step supports the next and protects the natural structure. With help from a skilled dentist in Maple Ridge, the tooth gains strength and long-term stability. This treatment offers relief and preserves your smile for years to come.