Are you ready to create popping colors and styles for your wardrobe collection ? Get ready to turn up your creativity volume with tie-dye, the ultimate fashion statement that’s both fun and creative. There are countless different patterns and designs to choose from but the easiest are;
Bullseye, spiral, stripes, crumble, chevron, heart, sunburnt, mandala, ombre, and V shape tie-dye patterns are among the easiest patterns to make at home. You can craft impressive and distinctive designs that are guaranteed to make an impact, with just a few simple materials and a dash of creativity.
It can be quiet overwhelming to decide on a design. Do not worry . Let’s have fun together as I show you the best 20 simple yet stunning tie-dye patterns that you can make in just a few minutes. Whether you just want to experiment , kill out boredom or want to launch your tie dye business, these patterns are sure to inspire and impress!
Related Reading
How to Tie Dye with Acrylic Paint?
Items You Can Tie Dye
Well, tie dye can be used on almost any material . Here are the common fabrics you can use for your tie dye project;
- Cotton Shirts
- Rayon
- Silk fabrics
- Wool items
- Polyesters
- Nylon
- Shoes
- Sweaters
- Pillow cases
- shawls
10 Tie Dye Patterns You Can Make Yourself
1)Bullseye Tie Dye Design/Pattern


- Pinch the center of a white fabric and twist it into a tight spiral shape.
- Divide the fabric into equal sections with rubber bands.
- Dip each section of the fabric into different colors of dye, leaving the center undyed.
- Next, wrap your tie dye fabric in plastic and leave it for a few hours for the dye to soak in few hours.
- Rinse the fabric in cool water, remove the rubber bands, and unfold the fabric to reveal the bullseye pattern.
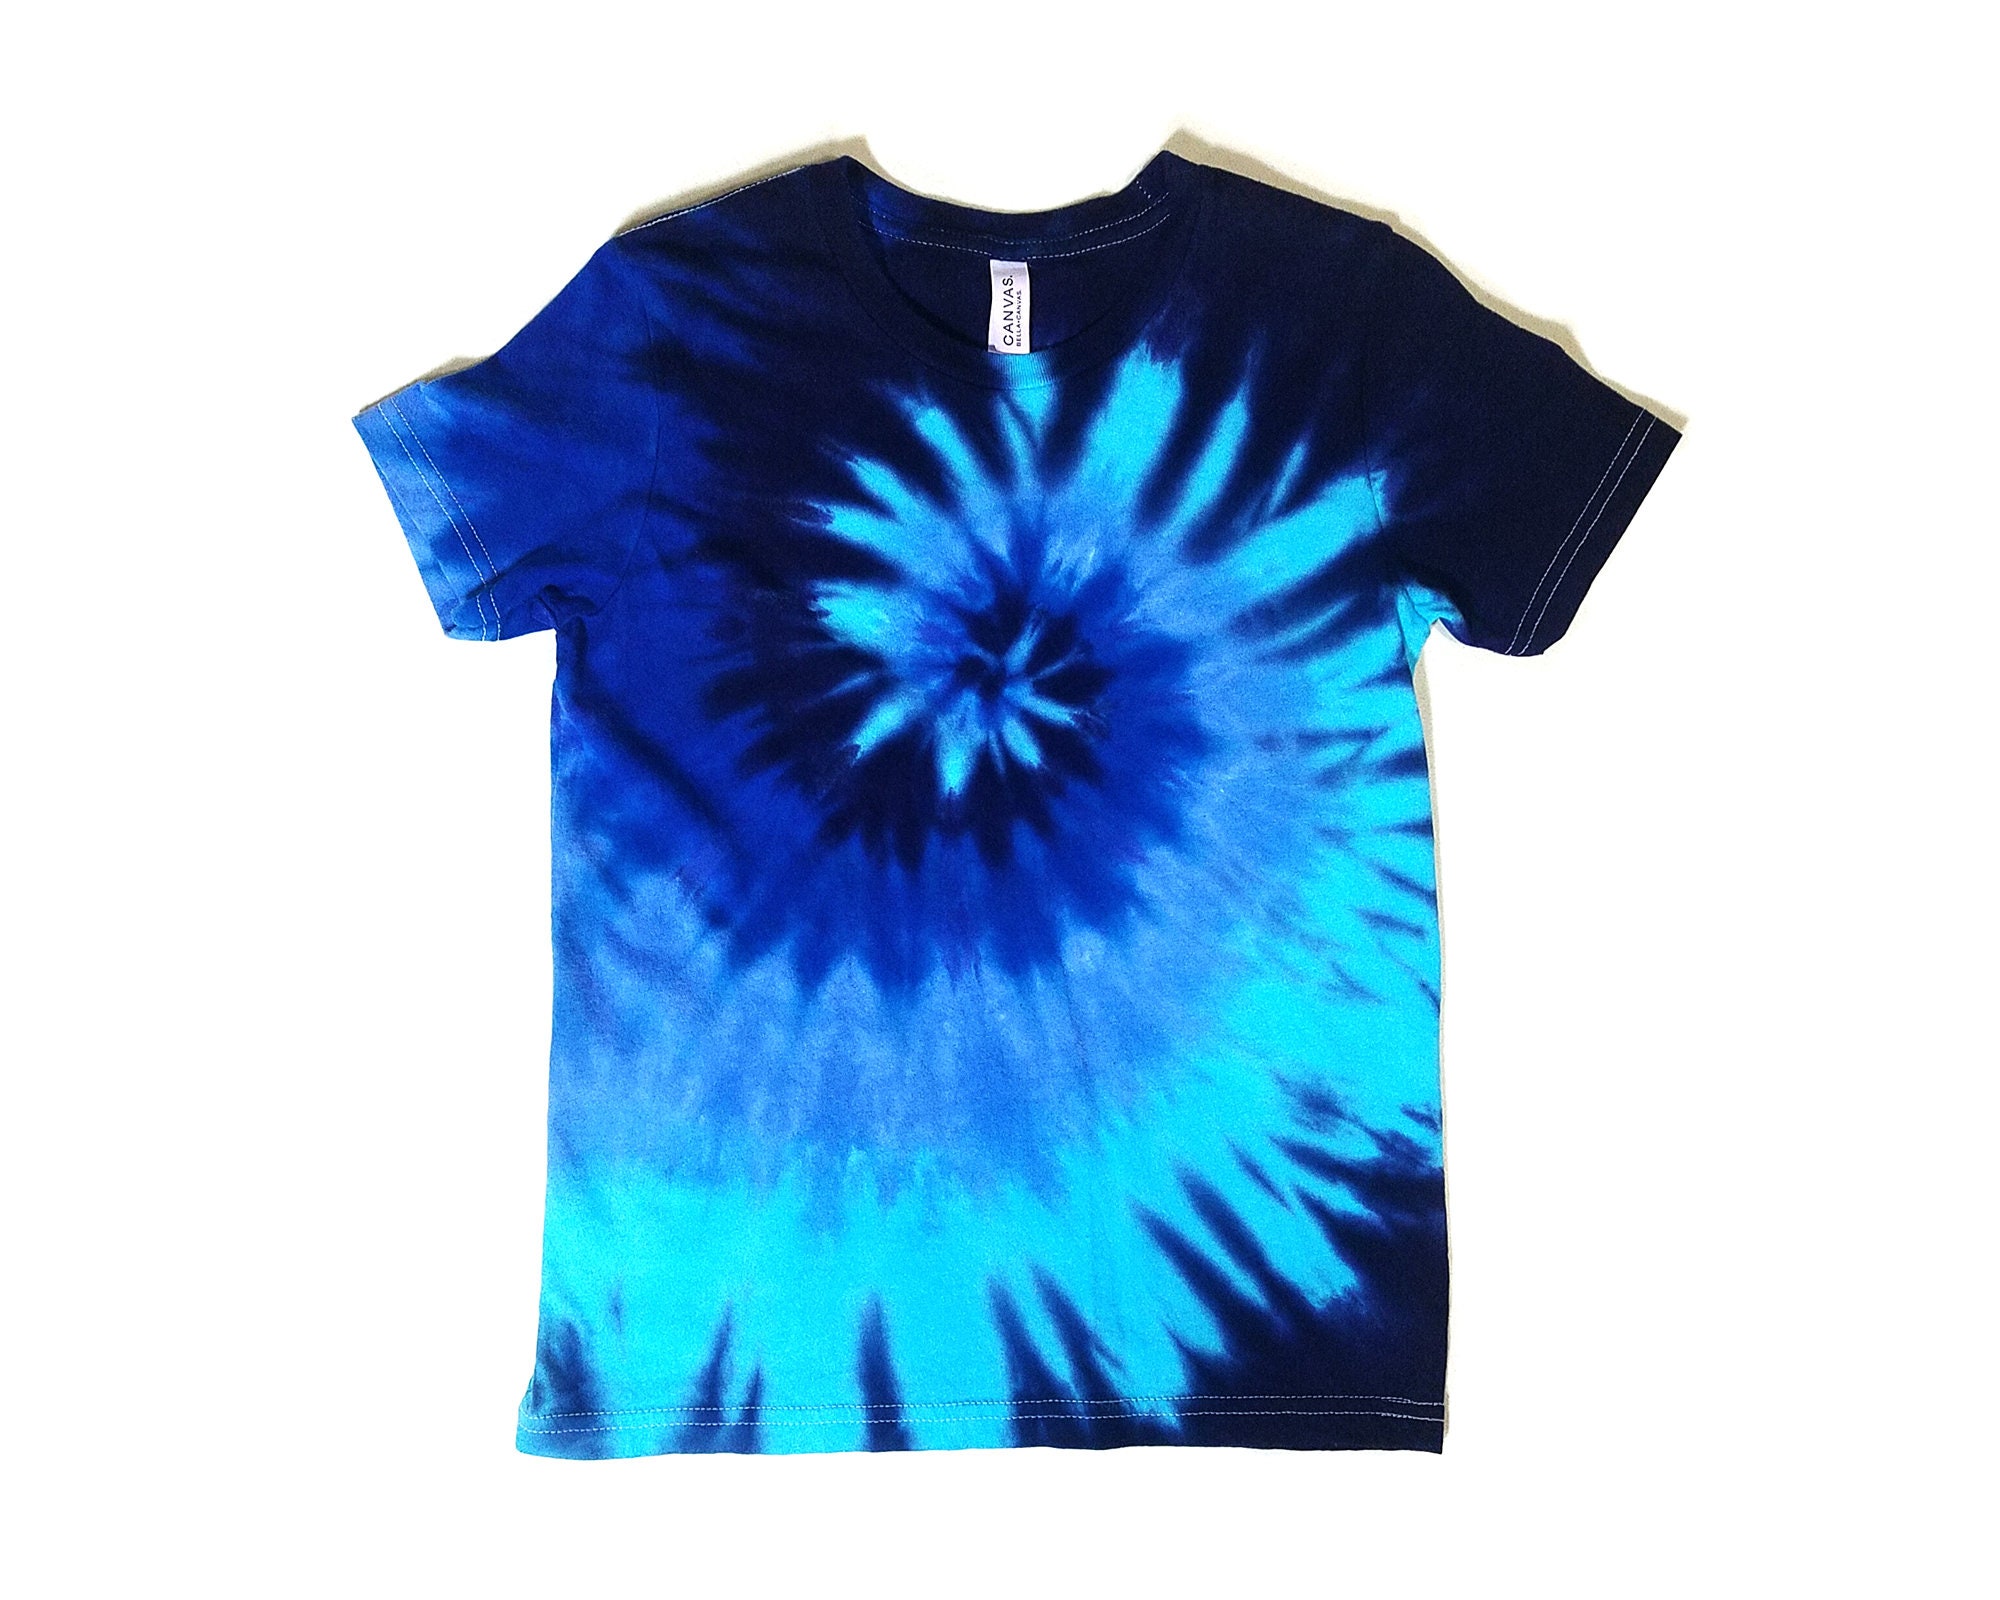
2) Spiral Tie Dye Design/Pattern
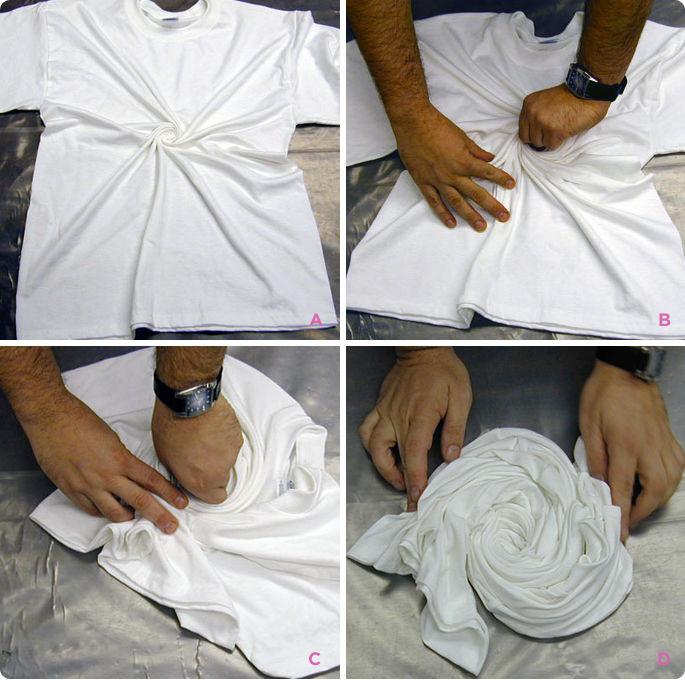

- Pinch the center of a white fabric and twist it into a spiral shape . While holding its center, twist the shirt clockwise direction.
- Secure the fabric with 4 -5 rubber bands, dividing it into equal sections. Make sure the rubber bands are tight .
- Apply different colors of dye to each section of the fabric using a squeeze bottle or dropper.
- Leave it for few hours to fully absorb
- Rinse the fabric in cool water to reveal the spiral tie-dye pattern.
3)Stripes Tie Dye Design/Pattern
:max_bytes(150000):strip_icc()/550_4-102481823_25_32-a5b9dc26254c4c8181b31e131497a9cf.jpg)
To make horizontal stripes on a shirt;
- First lay it flat on a surface. Then, starting from the left sleeve, fold the fabric in a series of 1-inch accordion folds. To achieve a neat and uniform look, ensure that the folds are straight and parallel to each other.
- As you fold, alternate the folds back and forth, similar to the motion of creating a paper fan. This technique will help you achieve a striped pattern that is evenly spaced and symmetrical.
- Once you have finished folding the entire shirt, secure it with rubber bands. Place the rubber bands every 1 to 2 inches along the length of the folded fabric. This will help keep the fabric in place and prevent the dye from bleeding into unwanted areas.
- You can use a brush, spray bottle, or sponge to apply the dye, depending on your preference.
- After applying the dye, allow the shirt to sit for the recommended time according to the dye manufacturer’s instructions. Rinse the shirt thoroughly with cold water until the water runs clear. Then, remove the rubber bands and unfold the fabric to reveal your beautiful horizontal stripes. Finally, wash the shirt with mild detergent and hang it to dry.
4) Crumple Tie Dye Design/Pattern

- Pinch and twist the fabric to create a tightly crumples
- Use rubber bands to secure the crumpled fabric in place, creating random sections where the fabric is bound.
- Mix your desired dye colors and apply the dye to the fabric, saturating the entire surface.
- Cover your tie dye fabric with plastic wrap or a plastic bag and let it sit for at least 6 hours or overnight.
- Rinse the fabric thoroughly under cold water until the water runs clear.
5) Chevron Tie Dye Design/Pattern


- Lay your shirt flat and fold it in half lengthwise.
- Draw a chevron V-shape with a washable marker on the folded edge, making it your own.
- Make some accordion pleats along the drawn line, ensuring that the marker line remains straight on the top of the folds.
- Once the fabric has been fully pleated, secure it with a thick rubber band at the end of the line and additional rubber bands as desired for a color-blocked or striped chevron look.
- Apply 2 or more colors of dye for a color-blocked look or apply dye in small sections alternating colors for a striped chevron effect.
- Let it stay on for a few hours
- Wash, dry it up and wear
6)Heart Tie Dye Design/Pattern


- Wash and dry the fabric to remove any sizing or dirt that may interfere with the dye absorption. Lay the fabric on any flat on a clean work surface.
- Fold the fabric in half lengthwise.
- Draw half of a heart shape onto the fabric with a washable marker. Make sure the heart is positioned in the center of the fabric.
- Pinch the fabric at the top of the heart and create small pleats down to all the sides of the heart. Make sure you secure the pleats with rubber bands to create the heart shape.
- Mix your desired dye colors according to the manufacturer’s instructions. Apply the dye to the fabric, making sure to saturate the entire surface. You can choose to apply different colors to different sections of the heart.
- Cover the dyed fabric with plastic wrap or place it in a plastic bag to prevent the dye from drying out. Let the fabric sit for at least 6 hours or overnight to allow the dye to fully penetrate the fabric. Rinse the fabric under cold water until the water runs clear, removing the rubber bands and the marker lines.
- After rinsing, wash the fabric in warm water with a mild detergent and dry it either in a dryer or by hanging it up to air dry.
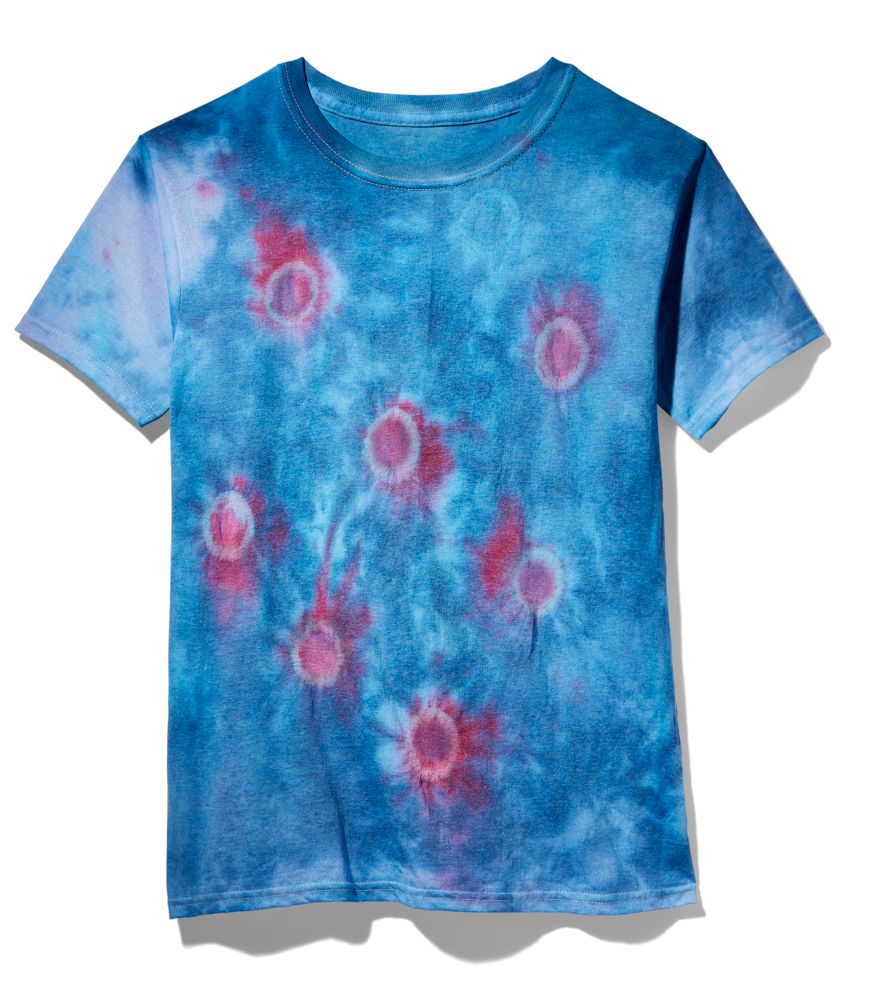
7)Sunburst Tie Dye Design/Pattern

- Clean your shirt and once clean, lay it down on a very flat surface or table
- Pinch a small section of the fabric and lift it upwards to form a small pointed cone shape.
- Next, secure the cone with a rubber band approximately half to one inch down from the tip of the cone.
- Repeat this step for as many times as you wish to make multiple sunbursts, each time securing with a rubber band. When you’re satisfied with the number of sunbursts on your shirt, prepare the dye according to the instructions provided in your tie-dye kit.
- Then, apply one or two colors of dye to the shirt to create the desired background color.
- You can use a brush or squeeze bottle to apply the dye. Allow the dye to set according to the instructions provided in your tie-dye kit.
- Once the dye has set, rinse the shirt thoroughly with cold water until the water runs clear.
- Finally, remove the rubber bands and wash the shirt in a washing machine using cold water.
- Dry the shirt in the sun, and enjoy your uniquely created sunburst tie-dye pattern.
8)Mandala (Kaleidoscope)Tie Dye Design/Pattern
- Place the shirt flat on a surface. Proceed to fold it lengthwise, then fold it in half widthwise. At this juncture the shirt will have been divided into four equal parts.
- Next, referring to the provided illustration, fold the shirt in half along the diagonal line. This will result in the shirt being folded into eight equal parts.
- Then, fold the shirt in half again along the diagonal line, resulting in the shirt being folded into sixteen equal parts.
- Once the folding process is done, use rubber bands to secure the shirt in place. Then apply dye in various colors to produce a unique design.
9)Ombre Tie Dye Design/Pattern
- Wash and dry the fabric to remove any dirt or sizing that could prevent dye absorption.
- Select colors that blend well together, such as shades of blue or pink, for the Ombre effect.
- gradually dilute the dye with water to create a range of shades, from dark to light.
- Dip one end of the fabric into the darkest dye mixture and hold it in place for several minutes. Gradually lift the fabric up, leaving the bottom of the fabric in the dye mixture. Repeat this process with each progressively lighter shade, working your way up the fabric until you achieve the desired ombre effect.
- Let the fabric sit for at least 6 hours or overnight to allow the dye to fully penetrate the fabric.
- Rinse the fabric under cold water until the water runs clear. Finally, wash the fabric in water with a mild detergent and dry it either in a dryer or by hanging it up to air dry.
10)V-pattern Tie Dye Design/Pattern
- Wash your shirt to remove any chemicals or dirt that may affect the dye’s absorption. Then, lay the shirt flat on a clean workspace and smooth out any wrinkles.
- Fold the shirt in half vertically, making sure the sleeves and bottom hemline match up.
- Fold the shirt in half again
- Fold the shirt in half horizontally, making sure the top and bottom edges match up.
- Create the V-pattern
- Starting at the top of the folded shirt, pinch the two layers of fabric together, and twist them clockwise to create a spiral. Then, fold the twisted fabric in half to create a V-shape. Use rubber bands to secure the V-shape tightly, making sure it’s compressed enough to resist the dye.
- Prepare the dye according to the instructions provided in your tie-dye kit. Apply the dye to the V-pattern, making sure to saturate it fully. Use a brush or squeeze bottle to apply the dye for precise results.
- Let the dye set for the time recommended in your tie-dye kit’s instructions. Then, rinse the shirt under cold water until the water runs clear. Carefully remove the rubber bands and unfold the shirt.
- Wash the shirt in a washing machine with cold water and mild detergent. Dry the shirt in the sun or in a dryer on a low heat setting.
- And that’s it! You should now have a unique V-pattern tie-dye design/pattern on your shirt.
What Is the Easiest Tie-Dye Technique?
Crumble tie-dye is considered the easiest technique, as it involves randomly crumpling the fabric and securing it with rubber bands. This creates an abstract pattern with minimal effort. Another tie dye pattern that is easy for beginners is the sunburst pattern.
How Long Should Tie-Dye Sit Before Rinsing?
It should be 8-24 hours, depending on the dye and the desired intensity of the colors. During this time, the dye molecules penetrate the fabric fibers and chemically bond with them, creating a permanent colorfast bond that won’t wash out easily. If you rinse the fabric too soon, the colors may appear faded and the pattern may not be well-defined.
What Are Two 2 Types of Fabric Suitable for Tie Dyeing?
The best two fabrics for tie-dyeing are cotton and rayon. Cotton is a popular choice due to its absorbency, which allows it to take on dye easily and hold onto the color well. The texture of cotton also creates interesting patterns when tied and dyed. Rayon also has a similar texture and absorbency to cotton but is softer and drapes beautifully, making it a great choice for clothing and accessories. Overall, both cotton and rayon are versatile fabrics that take dye well and can create beautiful tie-dye patterns.
What Are the Three Best Colors for Tie-Dye?
The best colors for any tie-dye projects are blue, green, and pink. Blue can create a calming and peaceful effect, green can evoke a natural and earthy feel, and pink can bring a fun and playful vibe. Combining these colors or using variations like turquoise or fuchsia can add more depth and interest to your tie-dye creations.
What Do You Soak Tie-Dye in First?
When tie-dyeing fabric, it’s essential to prepare the fabric to ensure that the dye sets properly and doesn’t fade or bleed. There are two common options for pre-soaking the fabric: vinegar and soda ash.
- Vinegar soak: A vinegar soak is a popular method for preparing fabric for tie-dyeing. The process involves soaking the fabric in a mixture of vinegar and water for about 30 minutes before dyeing. The vinegar helps to set the dye by making the fabric more acidic, which allows the dye to bond better with the fabric fibers. Additionally, vinegar can help to brighten the colors and prevent fading over time.
- Soda ash soak: A soda ash soak is another popular method for preparing fabric for tie-dyeing. This process involves soaking the fabric in a mixture of soda ash and water for about 30 minutes before dyeing. Soda ash is an alkaline substance that raises the pH of the fabric, making it more receptive to the dye. The higher pH also helps to set the dye by allowing it to bond better with the fabric fibers. Soda ash is particularly useful for tie-dyeing natural fibers, such as cotton, as it helps to make the colors more vibrant and long-lasting.
Overall, both vinegar and soda ash soaks are effective at preparing fabric for tie-dyeing. The choice of which to use depends on the fabric type and personal preference. Vinegar is a more gentle option and is recommended for delicate fabrics like silk, while soda ash.
Conclusion
If you’re inspired to try making your own patterns, start by practicing basic techniques with different materials. I encourage you to start experimenting with creating your own patterns. Don’t be intimidated, just start with small projects and build your skills over time.