
Acrylic paints have been on the rise lately. They are easy to work with and are not technical at all . If you are a creative , an artist or just want to experiment , you should know that acrylic paint can be used on just anything . But, what about if you want to paint a pumpkin, will acrylic paint work?
Acrylic paint can indeed be used to paint pumpkin. Firstly, ensure the pumpkin is cleaned and dried meticulously. Next, apply thin coats of paint, you should allow ample drying time between layers. For added protection, seal the painted pumpkin with a waterproof sealant.
After personally using acrylic paint on objects such as metal, wood, plastic, shoes, skin and leather, I will be showing you exactly how to make your pumpkins pop with acrylic paint for international pumpkin day or for your front porch. Read through !
Highly Recommended: The Best Acrylic Paints
How to Paint Pumpkins With Acrylic Paint?
Materials You Will Need
- Acrylic Paint( Check out the Best Acrylic Paints to pick a Favorite)
- A pumpkin( You can paint garden pumpkins or use AnyDesign 12Pcs Artificial Pumpkin)
- Primer: I suggest The Crafters Workshop Gesso Medium
- Palette or Mixing Surface
- Brushes
- Soapy Water and Tower
- Sealant ( Varnish or Spray )
- Vinegar
- Pencil or Market (Optional): You may consider using a pencil or marker to lightly sketch your design on the pumpkin before painting
Instructions
Step 1: Select the Appropriate Pumpkins
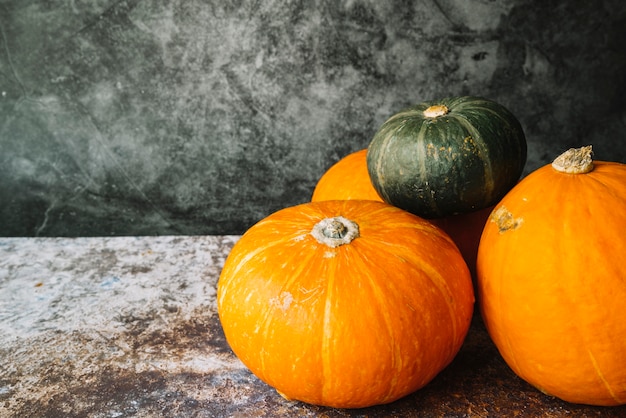
When picking up a right pumpkin for your acrylic painting, pay keen attention to the size and shape of the pumpkin. Look for one that has a smooth and even surface, as this will provide a better canvas for your artwork. You should avoid pumpkins with deep ridges or blemishes, as they may interfere with the paint application process. If you do not have fresh pumpkins, I recommend these AnyDesign 12Pcs Artificial Pumpkins and Winlyn 7 Sets DIY Fall Pumpkin Painting Kits for kids.
Besides that, you can also give a pumpkin a gentle press with your fingertips to ensure it feels firm and sturdy. Do not purchase pumpkins that have soft spots or show signs of rot, as they may not hold up well during the painting process and may deteriorate quickly.
Lastly, when choosing a pumpkin for acrylic painting, consider the stem of the pumpkin as well. A strong and intact stem can add character to your painted design and serve as an interesting focal point. Look for a pumpkin with a stem that is firmly attached and in good condition.
Step 2: Clean Your Pumpkins
Once you have picked the right pumpkin, it’s time for a clean up. Gently wipe the surface with a damp cloth or sponge to remove dirt and bacteria. Proceed to rinse the pumpkin under cool running water, but avoid submerging it. Finally, pat it dry with a towel or paper towels to ensure the pumpkin is completely dry before painting. Personally, I use Naturemania Value Pack of 24 Reusable Paper Towels when working with acrylic paint .
Step 3: Mix Your Acrylic Paint


To mix acrylic paint for pumpkin painting, squeeze small amounts of desired colors onto a palette or mixing surface. Use a palette knife to blend and create new shades. Experiment with different color combinations to achieve the desired hues. if the paint is too thick, you can thin out using water or acrylic paint thinner sparingly for a smoother consistency, if needed.
Only use the colors that complement your design and the overall aesthetic you want to achieve. It’s best to use Sargent artist-grade acrylic paints for better quality and longevity. I also recommend Nicpro 14 Colors Large Bulk Acrylic Paint Set (16.9 oz,500 ml) from my Best Acrylic Paints of this year review. You could also do pouring on your pumpkin with any of these Neon Acrylic Paints.
Step 4: Apply a Primer

Applying a primer before painting a pumpkin with acrylic paint is important for optimal results. Primers create a smooth and adhesive-friendly surface, allowing the paint to adhere better to the pumpkin. This improves the durability of the painted design, preventing chipping or peeling over time. Primers also help to enhance the vibrancy of the paint colors by providing a consistent base.
Step 5: Start Painting

Now that your acrylic colors are all set, begin painting your pumpkin by applying a base coat of acrylic paint. Use a larger brush for this step, covering the pumpkin evenly. You should allow the base coat to dry completely before moving on to the next steps.
Step 6: Add Extra Details and Additional Layers( Optional)

If the first layer is not thick enough, add details and layers by experimenting with brush strokes, blending techniques, and color combinations to create depth and texture(I know of a guy who does Impasto technique on his pumpkins and they turn our great) . All I am saying is that you do not have to do boring designs, get creative and try out different techniques. Again, allow each layer to dry before applying the next one.
Step 7: Correct Any Mistakes
If you make any mistakes, don’t worry! Acrylic paint is forgiving. Use a cloth or paper towel to remove or correct any errors while the paint is still wet. Acrylic paint is indeed water- based which means that you can easily get it off with water or rubbing alcohol. Gently wipe off the acrylic paint while it is still wet. This allows for quick adjustments and changes to your design. Same goes for rubbing alcohol-Simply dampen a cloth or cotton ball with rubbing alcohol and gently rub the paint off until it lifts off.
Step 8: Apply a Protective Sealant
Once your painted pumpkin is completely dry, consider applying a spray sealant or varnish to protect the design and enhance its longevity. After personally using Art Advantage Acrylic Varnish 8oz Gloss , I do think it is genuinely the best you can use on your pumpkin( it gives a very pleasing beautiful sheen to just about any color).
Step 9: Soak in Vinegar
Soaking pumpkins in vinegar is a technique that some people use to help prolong their lifespan and inhibit bacterial and fungal growth. Vinegar has natural antimicrobial properties that can help prevent decay. The acidity of vinegar creates an environment that is less favourable for bacteria and mold to thrive. By soaking the pumpkin in a vinegar solution, it is believed to create a protective barrier and extend the freshness of the pumpkin. It’s still essential to monitor the pumpkin for any signs of decay or mold growth.
How Long Will It Take for Acrylic Paint to Dry on Pumpkins?
Acrylic paint on pumpkins will take 20 minutes to 1 hour to dry according to the thickness of the paint layer and the environmental conditions. In some cases, it may take up-to 24 hours for your paints to dry. You can also check out an article I have written on How Long it Takes Acrylic Paints to Dry.
When working with white pumpkins, it’s worth noting that they tend to have a naturally lighter hue, which can make colors appear less vibrant compared to painting on orange pumpkins. To make the colors pop out more on white pumpkins, it is often necessary to apply multiple coats of paint
How Long Will Acrylic Paint Last on Pumpkins?
Painting pumpkins instead of carving them offers the advantage of extended longevity, lasting for approximately one month or even longer. To ensure the longevity of acrylic paint on a pumpkin, there are a few steps you can take. Firstly, clean and thoroughly dry the pumpkin before painting to create an ideal surface. Apply a primer to enhance adhesion and durability. You should also consider sealing the painted surface with a spray sealant or varnish. This protective layer helps to prevent fading, moisture damage, and extends the lifespan of the painted pumpkin.
The Best Acrylic Paints for Pumpkin Painting?
When it comes to choosing the best acrylic paints for pumpkin painting, a lot of beginners pick wrong. However, if you follow factors such as quality, color selection and ease of use, you should be fine. Three notable brands that meet these criteria are Liquitex, Winsor & Newton and Nicpro.
1) Liquitex Professional Heavy Body Acrylic Paint, Classic 12 x 59ml (2-oz) Set

Liquitex Professional Heavy Body Acrylic Paint is renowned for its high-quality acrylic paints, favoured by artists for their shiny colors and excellent coverage. It gives a satin finish that dries to glossy. Their acrylic paints also provide a smooth and consistent application for precise detailing and layering on pumpkins. Liquitex by the way offers a wide range of colors, including both traditional and unique shades. It is highly pigmented and remain vibrant even on pumpkins.
2)MONT MARTE Signature Acrylic Color Paint Set, 12 x 33.8oz (1L), Semi-Matte Finish

MONT MARTE Signature Acrylic Color Paint Set, 12 x 33.8oz (1L), Semi-Matte Finish is another well-respected series known for its durability. Their acrylic colors are known for effortless brushwork on pumpkins. MONT MARTE is easy to clean up and gives a matte finish.
3) Nicpro 14 Colors Large Bulk Acrylic Paint Set (16.9 oz,500 ml)

Another brand you should try out is Nicpro . Nicpro acrylic paint series is like the under dog of acrylic paint yet serves quality every single time. This a brand that offers affordable yet reliable acrylic paints. if you are tight on a budget but still want a quality acrylic paint, Nicpro comes in huge bottles to paint couple of pumpkins.
When using these three acrylic paints on pumpkins, you get the following benefits: excellent color payoff, smooth consistency, good coverage and a wide range of colors to choose from. Furthermore, these paints dry relatively quickly which is a plus.
How to Remove Acrylic Paint From a Pumpkin?
Removing acrylic paint from a pumpkin can be a bit challenging for new bies, but with the right procedures, it is easy. Here’s a simple step-by-step guide on how to remove acrylic paint from a pumpkin all by your self:
- Wipe off wet paint: If the acrylic paint is still wet, use a damp cloth or paper towel to gently blot and wipe away as much paint as possible. Be careful not to smear or spread the paint further.
- Rinse with water: After removing the wet paint, rinse the pumpkin under cool running water. This will help loosen and wash away any remaining paint residue. Use your fingers or a soft brush to gently scrub the surface, focusing on the areas with paint.
- Scrub with soap or dish detergent: If the paint persists, create a soapy solution by mixing mild dish detergent with water. Dip a clean cloth or sponge into the soapy water and gently scrub the painted areas. Rinse with water afterward.
- Use rubbing alcohol: If the paint stains are stubborn, dampen a cloth or cotton ball with rubbing alcohol and gently rub the affected areas. The alcohol helps break down the acrylic paint. Rinse with water to remove any residual alcohol.
- Use oil or petroleum jelly: This is a simple hack I usually use on my pumpkins. Just apply a small amount of oil or petroleum jelly to the stains. Then leave it for about 5-10 minutes to soften the paint. Proceed to gently rub with a cloth or sponge and rinse thoroughly afterward.
Expert Advice: By all Means, always protect your hands by wearing gloves during the paint removal process and always work in a well-ventilated area
How to Do a Pumpkin Pour With Acrylic Paint?
You will need pouring acrylic paint . For this tutorial, I will be using GenCrafts Acrylic Pouring Paint 24 Colors Pre-Mixed High Flow), Floetro, a pumpkin, a working table and mixing cups.
Instructions
Set up Your Working Station
First things first, set up a clean and well-protected working area. You can cover your working table with plastic or a drop cloth to catch any paint drips and spills.
Get Your Pouring Acrylic Paint Ready
Choose a variety of colors from your pouring acrylic paint set that complement each other and fit your desired aesthetic. To mix acrylic paint for pouring in one cup, begin by adding a small amount of pouring medium into the cup. Gradually add your chosen acrylic paint colors, stirring well after each addition, until you achieve a smooth and fluid consistency. I did not use medium for this tutorial because my acrylic paints came pre-mixed already. But if you are using acrylic paint and the medium separately, adjust the paint-to-medium ratio as needed for your desired pouring consistency.
Apply Floetrol ( Optional)
To apply Floetrol to a pumpkin before painting, pour a small amount of Floetrol into a mixing cup. Use a brush or sponge to apply a thin and even layer of Floetrol onto the pumpkin’s surface. Allow it to dry completely before proceeding with acrylic paint application.
Pour the paint, Tilt and rotate the pumpkin
Once the Floetro is dry , pour a small amount of acrylic paint onto the top of the pumpkin. Allow the paint to spread naturally. Repeat this process and tilt the pumpkin gently in different directions to flow and mix organically. You can also rotate the pumpkin to ensure even coverage on all sides.
Control the Pour Technique
Use a palette knife or skewer to guide the paint and create interesting patterns or swirls on the pumpkin’s surface. Be careful not to overwork the paint or mix the colors too much, as it may result in muddy colors.
Let it Dry and Seal the Paint
Allow the pumpkin to dry completely. To protect the painted surface and enhance its longevity, you can apply a clear acrylic sealant or varnish. Creating a pumpkin pour with acrylic paint allows for endless creativity and beautiful results. Enjoy the process as you paint and experiment with different color combinations and techniques to achieve your desired effect. It’s totally fun !
What Other Paints Can You Use to Paint Pumpkins?: Acrylic Paint Alternatives

When it comes to painting pumpkins, here are great options beyond traditional acrylic paints;
- Spray Paint: Spray paint can provide quick and even coverage on pumpkins. Look for spray paint specifically designed for outdoor use. Krylon K03150 Spray Paint is among the best spray paints right now.
- Chalk Paint: Chalk paint creates a matte, velvety finish and adheres well to pumpkins. It can give your pumpkins a rustic or vintage look. Consider sealing the chalk paint with a clear coat to protect it from moisture.
- Metallic Paint: Metallic paints, such as gold, silver, or bronze will add a touch of glamour to your pumpkin decorations. Think of it as a way to create a shiny, reflective surface that can make your pumpkins stand out. I recommend DecoArt Americana Dazzling Metallics
- Neon Paints: For a fun and spooky effect, you can use neon paints on your pumpkins. They will absorb light during the day and glows at night, adding an eerie element to your Halloween decor.
- Fabric Paint: Fabric paint can adhere well to pumpkins and provide a slightly textured finish. It works particularly well if you want to create intricate designs or patterns on your pumpkins.
How Do You Keep a Pumpkin From Rotting After Painting?
To keep a painted pumpkin from rotting, you can consider the following points:
- Control temperature and Humidity: Maintain temperatures between 50 and 60 degrees Fahrenheit (10-15 degrees Celsius) and humidity levels around 50 percent. Extreme temperature changes and high humidity can contribute to pumpkin decay. Keeping a stable environment can help prolong its lifespan.
- Prevent Mold Growth: Mold is a common cause of pumpkin rot. To keep mold at bay, regularly inspect the pumpkin for any signs of mold or mildew. Gently wipe it off with a cloth or sponge dampened with a mild bleach solution. Ensure the pumpkin is completely dry before sealing or displaying it.
- Apply a sealant: Use a sealant can help create a protective barrier over the painted surface of the pumpkin. After the paint has dried, apply a clear acrylic sealant to help preserve the pumpkin and prevent moisture from seeping in.
- Consider soaking in vinegar: Some people find that soaking a pumpkin in a vinegar solution can help extend its lifespan. Mix a solution vinegar to water and submerge the pumpkin in the mixture for about 30 minutes. The ratio can be 1 part of vinegar to 10 parts of water. After soaking, let the pumpkin air dry before painting or displaying it. The acidity of vinegar will help inhibit bacterial and fungal growth.
Is It Possible to Directly Apply Acrylic Paint to a Pumpkin Without the Need for Priming?
It is possible to directly apply acrylic paint to a pumpkin without the need for priming. Acrylic paint adheres well to the surface of pumpkins, allowing you to paint them directly. However, priming the pumpkin with a coat of white acrylic paint or a suitable primer can help create a smoother base and enhance the vibrancy of the colors. It also provides better adhesion and longevity to the paint. While priming is not mandatory, it can improve the overall results and durability of the painted pumpkin.
Also, if you plan to pour acrylic paint onto a pumpkin, you can use a pouring medium such as Floetrol. Floetrol is commonly used in acrylic pouring techniques to improve paint flow and create desirable patterns. This mixture helps the paint to spread smoothly and evenly over the pumpkin’s surface. However, you should know that pouring large amounts of paint onto a pumpkin can make it more prone to rotting. It’s crucial to ensure the pumpkin is properly cleaned and dried before pouring and to monitor its condition to prevent decay.
Pumpkin Painting Ideas


Images Sources: Pinterest
Frequently Asked Questions
How Do You Keep Acrylic Paint From Cracking on Pumpkins?
To prevent acrylic paint from cracking on pumpkins, it’s essential to ensure the surface is clean and dry before painting and apply a sealer after painting for longevity.
Will Acrylic Paint Wash off Pumpkins in the Rain?
Acrylic paint is not waterproof by itself, so it may wash off pumpkins in the rain. To protect the painted surface, apply a waterproof sealant or varnish over the acrylic paint. This helps create a barrier against moisture and improves its resistance to rain. Ensure the sealant is fully dry before exposing the painted pumpkin to water
Conclusion
In conclusion, acrylic paint can be used effectively on pumpkins to create vibrant and colourful designs. By following proper preparation techniques, such as cleaning and drying the pumpkin, applying thin coats of paint, and sealing the finished artwork, you can enhance its longevity. Embrace your creativity and explore the possibilities of using acrylic paint on pumpkins for festive decorations. Start painting and let your imagination run wild this pumpkin season!
SOURCES
- Good House Keeping: 65 Cool Pumpkin Painting Ideas Way Easier Than Carving
- Acrylicpedia: What are acrylic paints?
- Acrylicpedia: Do acrylic paints wash off?