
Okay, working with acrylic paint is fun especially if you are painting on Canva, stones, wood or fabric. But, have have you ever tried hydro dipping with acrylic paint? Is it even possible?
To hydro dip with acrylic paint, prepare a container of water and add drops of acrylic paint. Tape off the areas of the object you don’t want to paint. Next , dip the object into the water, submerging it completely. If your acrylic paint is dense, you can thin it out to make it float on water. Slowly lift it out to let the excess paint drip off. Rinse if needed and allow it to dry thoroughly before removing the tape. Lastly, apply a clear coat for protection and a glossy finish
If you are thinking about hydro dipping any item with acrylic paint for the very first time, there is a lot you should know before attempting such as; recommended surfaces for dip painting, types of hydro dipping, the best paint for hydro dipping and how to seal your project for a perfect shine. Precisely, this article is for beginners Read on !
Recommended Posts:
- Top 10 Best Acrylic Paints in 2023
- The Best Neon Acrylic Paints
- How to Tie Dye with Acrylic Paint?
- Is Rustoleum Spray Paint Acrylic?
What is Hydro Dipping?
Hydro dipping, also referred to as water transfer printing, water marbling, or hydrographic printing, is a technique used by artists to decorate the surfaces of different objects with intricate and eye-catching patterns or designs. While there are many types of hydro dipping, paint hydro dipping involves directly dipping an item into a container filled with paint or dye, allowing the color to adhere to the surface. It is pretty much simple and a very effective way to apply paint to 3D objects.
Hydro Dipping Film Vs Hydro Dipping: Know the Difference
Before we even you further, I want you to know that Hydro Dipping Film and Hydro Dipping are totally different. Here is the difference;
Hydro Dipping Film
Hydro dipping film, also known as hydrographic film, is a pre-printed, water-soluble film used in hydro dipping. The film is laid onto the surface of warm water, where it dissolves and releases the ink or design onto the water’s surface. The object to be decorated is then dipped into the water, and the ink wraps around the object’s surface, transferring the design.
Hydro dipping film allows for precise and intricate patterns, as the designs are pre-printed on the film. It requires the use of an aerosol activator to dissolve the film and activate the binding agents in the inks. No spray paint is required in the process, resulting in less mess and fewer fumes.
Hydro Dipping
Hydro dipping, also known as water transfer printing, involves using water as a medium to transfer a design onto an object’s surface. In hydro dipping, the object is dipped directly into a container filled with a paint solution, which may include acrylic paint, oil paint, or other types of paint.
The paint solution is typically prepared by adding a dispersing agent to make the paint float on the water’s surface. The object is dipped into the paint solution, allowing the paint to adhere to its surface and create the desired design or pattern. Hydro dipping allows for greater flexibility in paint selection and color combinations compared to hydro dipping film. It can be done using various paints, including acrylic paint, and offers more control over the design outcome.
Types of Hydro Dipping?
Now that you know what hydro dipping is, let’s take a look at the types so that you do not get confused;
Type 1: Acrylic Paint Hydro Dipping
You can hydro dip with acrylic paint. However, acrylic paint is usually heavier and you may need to thin it out first with water before dipping. You will also need density to make your acrylic paint float . To achieve good density , add borax or cornstarch to your water. Here’s how you can hydro dip with acrylic paint;
Materials Needed
- Object: Choose the item or objects you want to dip paint. Materials like wood, plastic, metal, glass, or ceramics are perfect.
- Paint: Select the type of paint suitable for your project. Acrylic paints are commonly used for dip painting due to their versatility, fast-drying nature, and wide range of colors available. By the way , here are the best Top 10 Acrylic Paints in 2023.
- Cornstarch or Borax: You can add a little of cornstarch or borax for density.
- Container: I recommend you use a container large enough to accommodate the size of your item. It should be deep and wide enough to fully immerse the object. Consider using a plastic bucket, a shallow tray, or a large tub, depending on the size of your project.
- Protective Gear: Dip painting can get messy, so it’s a good idea to wear protective gear such as gloves and an apron or old clothing to prevent paint from getting on your skin or clothes.
- Stir Stick: You’ll need a stir stick to mix the paint thoroughly before dipping the object. A wooden or plastic stir stick will work well for this purpose.
- Drop Cloth or Newspaper: Place a drop cloth or old newspapers on your work surface to catch any paint drips or spills, making clean-up easier.
Optional: If desired, you can use a primer or base coat before dip painting to enhance adhesion and provide a solid foundation for the paint. Sandpaper or a sanding block can also be useful for preparing the surface of the object by smoothing out any imperfections.
The Process
1)Prepare Your Object

Preparing your object before dip painting it with acrylic paint is crucial for achieving the best possible results and ensuring a long-lasting finish.
You can start by making sure that it is dust free by thoroughly cleaning the object before painting, you eliminate these contaminants, providing a clean surface for the paint to adhere to. This allows for better paint coverage and a smoother, more professional-looking finish.
If at all your item is a bit rough, you can sand it to smoothen it out( I recommend these sand paper sheets). You don’t want roughness, imperfections, or previous coatings. By sanding the surface, you create a smooth canvas for the paint, allowing it to apply evenly and seamlessly. A smoother surface also helps prevent the paint from cracking or peeling over time.
2) Prime Your Object ( Optional)
You may also want to know that some items need better paint adhesion as they may have not naturally conducive to paint adhesion, such as certain plastics or metals. Applying a primer or base coat specifically designed for the material promotes better adhesion and creates a strong bond between the object and the paint. Rust-Oleum Primer is a favorite for a lot of people. This ensures that the paint adheres well and resists chipping, flaking, or peeling, resulting in a more durable and long-lasting finish.
3)Thin out Your Acrylic Paint

Now that you have primed out your object. It is time to thin out acrylic paint. This is important because acrylic paint is usually very thick. But for hydro dipping, you need the paint to be able to float on water. This is where thinning comes in. You can thin out acrylic paint with water or with any other acrylic medium. Keep the ratio at 2:1 ( Paint: water). I have a separate article on how to thin out acrylic paint with water. Check it out here!
4)Make Your Water Base/ Water Solution
Now that your object is fully primed up and your acrylic paint thinned out. It is time to create your solution/water base to dip the object. To get started;
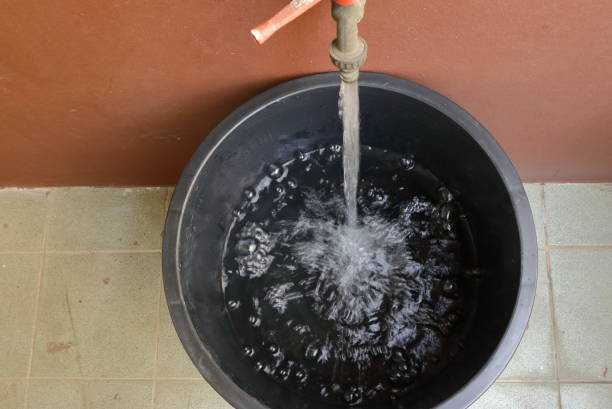
- Fill the container with enough water , not too much. Just enough
- Add 1/2 tea spoons of acrylic paint to the water in the container( If it floats, perfect. However, if it sinks then you need to thin it out again until it floats)
You can also add to the water density in the container by adding in cornstarch or borax. If you are using cornstarch it is pretty much simple- Boil one cup of water . In a separate bowl, 2-3 tea spoons of cornstarch, stir and add into the boiling water till it forms up a thick paste. Boil it for a few minutes and have it cool . Next, add it to your hydro dip water. This will add density to your solution.
5) Now, Time to Hydro Dip
Once you have your acrylic paint floating on water, put on your gloves and immerse the object into the water. You can also stir up the water a little up so that your acrylic paint is 100% absorbed. Only do a second dip once the first dip has dried up. Keep in mind that you can do as many dips as you want, there are no rules. Once you have achieved your perfect dip, get your object out of the water and let it dry for about 30-1 hour. Acrylic paints really dry faster, so that should not be a problem. ( Check out this article on how long it takes for acrylic paints to dry )
6) Seal it( Optional)

Sealing your item after hydro dipping in acrylic paint is important for a couple of reasons. For starters, it offers complete protection. The clear sealant acts as a protective barrier for the painted surface, shielding it from scratches, abrasion, and general wear and tear. It helps to preserve the design and extend the longevity of the hydro dipped finish.
The sealant also enhances the durability of the paint job by providing an additional layer of strength and resistance. It helps to prevent the acrylic paint from chipping, flaking, or peeling off the surface, ensuring that the design remains intact.
Acrylic paint, although water-based, is not completely waterproof on its own. By sealing the hydro dipped item, you make it more resistant to water damage, moisture, and humidity. This is particularly important for objects that may be exposed to water or require regular cleaning.
Lack Ideas: Try Out These Techniques For Hydro Dipping With Acrylic Paint
Now that you know how to hydro dip with acrylic paint, I am sure you do not want to be a boring artist. You can avoid the regular vanilla dip method and try out some amazing creative techniques to create beautiful dip paints.
a) 3D Marbling
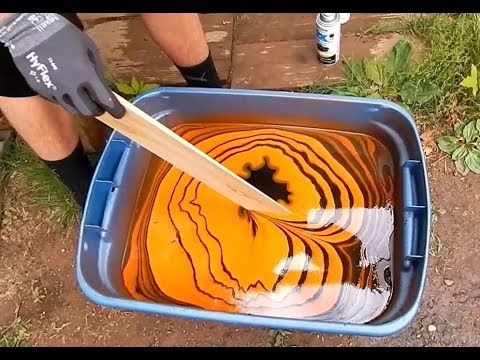
Creating the Marbling Effect with acrylic paint is very easy;
- You need pour your mixed paints into the container, layering them in a random or desired pattern. Use multiple colors to add depth and visual interest. Swirl the colors together using a stir stick or other tool, creating a marbling effect. Be careful not to overmix and lose the distinct color patterns.
- Hold your object by its edges or a suitable handle, and carefully dip it into the container, submerging it into the marbled paint. Rotate the object slightly to encourage the paint to adhere and create a dynamic pattern. You should let any excess paint drip off.
- Gently lift the object out of the container, letting any excess paint drip back into the container.
- Place the object on a clean surface or a drying rack, ensuring it is level.
- Allow it to dry completely, following the recommended drying time for acrylic paints.
Do finial touches by Inspecting your dried marbled design, ensuring that it has the desired 3D effect. If desired, apply a clear protective coat to seal the paint and enhance durability.
b) Paper Marbling
To create a paper Marbling Design:
- Take one color of paint and gently pour it onto the surface of the water in the container. Repeat this step with other colors, layering them as desired.
- Use a stir stick or skewer to create swirls or patterns on the surface of the paint, allowing the colors to blend together organically.
- Here comes the fun part- dip the paper onto the water’s surface to ensure full contact with the paint.
- Get your paper out and place it flat surface or a drying rack, ensuring it does not come into contact with other surfaces or objects.
- Lastly, leave your paper to dry completely. If you are using acrylic paint, it can take a few minutes.
Does Acrylic Paint Float on Water?
Acrylic paint does not naturally float on water. Acrylic paint is water-based, but it is denser than water. So it typically sinks when applied directly to the surface of water.
However, there are techniques to make acrylic paint float on water for hydro dipping or other artistic applications. These techniques involve adding specific additives or thickening agents, such as dish soap, gel medium, Silicone oil or specialized hydro dipping activators to the paint mixture. These additives alter the paint’s density and surface tension, allowing it to spread and float on the water’s surface, making it suitable for hydro dipping.
Type 2: Dip Painting With Oil- Based paints
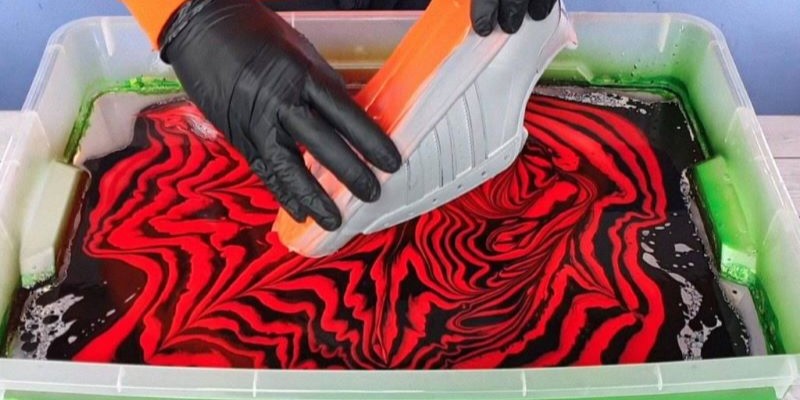
Image Source: LHStore
Now, that we have looked at hydro dipping with acrylic paint, it is time to check out how you can do the same with oil based paints. To dip paint with oil-based paints, follow these precise steps:
- Start by covering your work surface with a drop cloth or old newspaper to protect it from any potential paint spills or splatters.
- Choose your container: Select a container that is large enough to comfortably fit the object you want to dip paint. Your container should be suitable for oil-based paints and can withstand any solvents or thinners you may need to use.
- Now, prepare the paint: Stir the oil-based paint thoroughly to ensure it is well mixed. If the paint is too thick, you can thin it with an appropriate solvent or thinner following the manufacturer’s instructions.
- Dip the object : Hold the object firmly and lower it into the container of oil-based paint at a steady pace. Completely submerge the object in the paint, making sure it is evenly coated.
- Remove excess paint: Slowly lift the object out of the container, allowing any excess paint to drip off. You can gently shake or tap the object against the container’s side to remove additional drips.
- Allow drying and curing: Place the dipped object on a drying rack or a clean surface and allow it to dry completely. Oil-based paints generally take longer to dry compared to water-based paints, so be patient and follow the paint manufacturer’s recommended drying time.
- Clean up: Clean your container, tools, and brushes with an appropriate solvent or thinner for oil-based paints.
Expert Advice: Work in a well-ventilated area and wear protective gloves or a mask if necessary.
Type 3: Spray Paints: How to Hydro Dip With Spray Paint
To achieve a unique hydro-dipped design using spray acrylic paint, follow these precise steps;
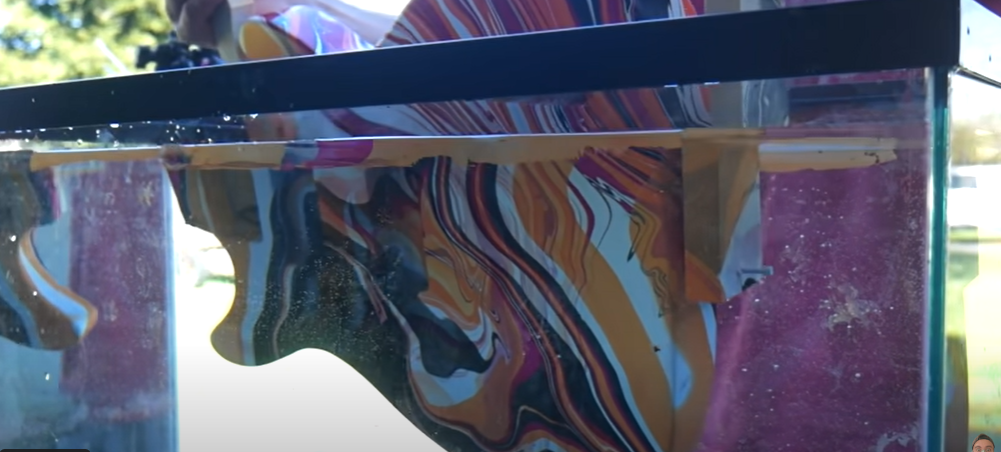
- Begin by filling a container with water, ensuring it is deep enough to fully immerse your object.
- Carefully spray your chosen acrylic paint colors into the water, you can gradually adding more for a more opaque design. For a marbled effect, opt for three or four colors should be fine.
- Next, prepare your object( it can be metal, moulded clay, etc) by securely taping it to a drop cloth or old newspaper. Ensure the entire object is covered by the tape to protect any unwanted paint contact.
- Lift the taped object and hold it above the water container.
- Slowly lower the object into the water, moving it around gently to allow the paint to cover the entire surface.
- Adjust the positioning until you’re satisfied with the coverage and design.
- Once achieved, lift the object out of the water and set it aside to dry completely.
After the paint has dried, carefully remove the tape from the object, to reveal your beautifully hydro-dipped design.
Best Spray Paint For Hydro Dipping
There are lots of paint you can use for your hydro project. However, after personally using these products below, I can confidentially say that they are my favorite. As an artist my self, I recommend them;
- Best Overall
1) Rust-Oleum 249058 Painter’s Touch 2X Ultra Cover
- Best Overall
Rust-Oleum 7786830 Stops Rust Spray Paint, 12 oz, Gloss Smoke Gray (Pack of 2)
- Best Overall
MTN Hardcore Spray Paint – RV30 – Electric Blue
Read Review - Best OverallRead Review
Best Paint for Hydro Dipping Without Spray Paint
1) Marabu Easy Marble Paint Starter Set

The Marabu Easy Marble Paint Starter Set is a versatile and user-friendly option for hydro dipping projects. This set offers a range of vibrant colors that can create stunning marble effects on various surfaces. The paint is specifically formulated for easy application and floating on water, making it suitable for hydro dipping techniques.
The set provides a good selection of colors, allowing for creative combinations and unique designs. The paints are water-based and quick-drying, which is advantageous for achieving efficient and timely results. The kit includes clear varnish for sealing the dipped objects, providing protection and enhancing the longevity of the designs.
Users have praised the Marabu Easy Marble Paint for its consistent performance and vibrant color payoff. The colors spread smoothly on the water’s surface, making them easy to work with. Additionally, the set is designed for beginners, ensuring a hassle-free and enjoyable hydro dipping experience.
2)Humbrol Enamel Paints

Humbrol Enamel Paints are a popular choice for hydro dipping projects. These paints are known for their high-quality and vibrant color range. The enamel formulation provides excellent adhesion and durability, making it suitable for long-lasting hydro dipped designs. The paints offer smooth application and can be thinned for desired consistency.
The Humbrol Enamel Paints dry to a glossy finish, adding a professional touch to the hydro dipped objects. Overall, these paints are a reliable option for achieving vibrant and durable results in hydro dipping projects.
How to Hydro Dip Without Spray Paint?
Many individuals may prefer alternatives to spray paint when it comes to hydro dipping due to various reasons and preferences. Here are some alternatives that you can use;
1)Acrylic Marbling
Acrylic paint is a popular choice for hydro dipping as it offers a wide range of colors, finishes, and viscosities. It allows artists to create vibrant and intricate designs with excellent control over the paint application. I have already covered how to dip paint with acrylic paint. Check the top of this article.
The best part of acrylic paint is that it can be thinned with water to achieve the desired consistency, making it suitable for creating marbling effects. Its versatility and availability in various shades and brands make it a favoured medium for those seeking customized and artistic hydro dip designs.
2)Enamel Paint and Borax
Enamel paint is another alternative that some people prefer for hydro dipping. Enamel offers excellent adhesion and durability, making it suitable for objects that require a more robust finish. To execute this technique, follow these steps:
- Obtain undiluted oil-based enamel paint, such as Humbrol paints, known for their quality. Additionally, you will need warm water that has been allowed to rest and borax.
- Pour the warm, rested water into a container suitable for the size of your object. Add the desired amount of borax to the water, stirring gently until it dissolves completely. The borax helps create a conducive environment for the swirling effect.
- Take the undiluted oil-based enamel paint and carefully drop it into the prepared borax water. Allow the paint to naturally disperse and swirl within the water.
- Avoid stirring or agitating the mixture, as the organic swirling effect occurs spontaneously.
- Watch as the enamel paint interacts with the borax water, creating captivating and organic swirl patterns. The warm water and borax provide the ideal environment for the paint to disperse and form unique designs.
- Dip Your Object: When you are satisfied with the swirling effect, immerse your object into the mixture.
- Ensure the entire surface of the object is fully submerged, allowing the swirling enamel paint to adhere to its surface.
- Remove your object out of the mixture and place the object on a drying rack or a suitable surface and let it dry completely.
- Avoid touching or disturbing the painted surface until it has dried thoroughly.
3)Hydrographic Film
Hydrographic film, also known as water transfer printing film, is a specialized medium designed specifically for hydro dipping. It offers a vast selection of intricate patterns, designs, and graphics. You can add an aerosol activator to dissolve the film and activate the binding agents in the inks.
The film is placed on the water’s surface, and when the object is dipped, the pattern adheres to its surface, creating a professional and detailed finish. Hydrographic film allows for precise replication of complex designs that may be challenging to achieve with spray paint or other mediums.
4) Nail Polish
Fun -fact. You can actually create beautiful dip paints with your nail polish. That’s right! Here’s how;
- Collect the nail polish colors you want to use, a container with room-temperature water, and the object you wish to dip paint. I recommend Beetles Neon Gel Nail Polish Set or Kleancolor Nail Polish.
- Next, fill the container with enough room-temperature water to fully submerge your object. Make sure the water level is sufficient to accommodate the size of the object.
- Add the nail polish: Open the nail polish bottles and have them ready for use. One by one, pour drops of the nail polish colors onto the water’s surface. Create a pattern or design by adding multiple drops in various colors.
- Create the desired effect: You can use a toothpick or a thin tool to gently swirl the nail polish drops on the water’s surface. This will create marbling or swirling patterns according to your preference.
- Experiment with different techniques to achieve your desired effect.
- Dip the object: Once you are satisfied with the nail polish design on the water’s surface, carefully dip your object into the water. Immerse it completely and remove it in one smooth motion to ensure the paint adheres evenly.
- Remove excess polish: As you lift the object out of the water, allow any excess nail polish to drip back into the container. Hold the object steady for a few moments to let any remaining excess polish settle.
- Let it dry: Place the dipped object on a protected surface and allow it to dry completely. Avoid touching or disturbing the painted surface during the drying process to prevent smudging.
Its way easy guys. Really straight forward
How to Hydro Dip Shoes With Acrylic Paint?
Customizing your sneakers and giving them a unique look using acrylic paint and water is a simple process. Hydro dipping is the ideal method for achieving this. To begin, you will need the following materials:
- A container large enough to accommodate dipping your shoes
- Acrylic paint in your preferred color( I recommend these best acrylic paints in 2023, you can also try out neon acrylics or spray paint)
- Optional: Cardboard or a drop cloth to protect your work surface
Instructions
- Protect your work area: Place cardboard or a drop cloth on the ground to safeguard the surface beneath from paint splatters.
- Prepare the paint mixture: Pour the acrylic paint into the container of water. Stir gently until the color is evenly distributed throughout the water.
- Submerge your shoes: Carefully place your shoes into the water, ensuring they are fully immersed. Allow them to remain in the water for a few minutes, enabling the paint to adhere to the fabric. In case you only want to dip paint a specific section of your shoes, you can mask the other part using tape.
- Remove and dry the shoes: Once the shoes are covered with paint, lift them out of the water. Let any excess paint drip back into the container. Place the shoes in a well-ventilated area to air dry completely.
- Seal with a fabric protector. I use Scotchgard Fabric & Crafts Water Shield
Remember , you can use cornstarch or borax to add some density to your dip water. You should also thin out acrylic paint if it is too thick.
Hydro Dipping Tumbler With Acrylic Paint?
Hydro dipping a tumbler with acrylic paint is a straightforward process. Here’s how;
- Clean your tumbler, first: Make sure it is clean and free of any dust or debris. It’s recommended to wash and dry it thoroughly beforehand.
- Fill up a container with water: Take a container large enough to submerge your tumbler completely.
- Pick your acrylic paints: Just select the acrylic paints you want to use for your design. You use either spray paint or just regular acrylic paint.
- Cover the opening of the tumbler : if you do not want the paints to get on the inside, use a tape or any other material.
- Drop the acrylic paint onto the water’s surface, creating a pattern or design. Use a brush, toothpick, or other tools to manipulate the paint and create different effects. You can also mask other parts using a tape .
- Dip the tumbler: Hold the tumbler by its edges or attach it to a holder if needed. Carefully dip the tumbler into the water, allowing the paint to wrap around its surface. Rotate and move the tumbler slightly to achieve desired coverage and pattern. You can also double dip.
- Remove excess paint: Lift the tumbler out of the water, allowing any excess paint to drip off. You really have to be a little careful .
- Let it dry and seal: Set the dipped tumbler aside in a clean and dry area to allow the paint to dry completely. Once dry, you can apply a clear sealant or epoxy coating for added protection and a glossy finish.
What Materials are suitable for Hydro Dipping?
Hydro dipping is so much fun can be done on a variety of materials. Here are some materials that are suitable for hydro dipping:
- Plastics: Hydro dipping works well on plastic objects, such as phone cases, game controllers, automotive parts, and helmets. It adheres nicely to the smooth surface of plastics, providing a vibrant and durable finish.
- Metals: Metal objects can also be hydro dipped, including items like bike frames, car rims, firearms, and metal accessories. Make sure that the metal surface is clean and properly prepared for optimal adhesion.
- Wood: You can also do hydro dipping can be applied to wooden items, such as furniture, picture frames, and wooden crafts. It can add a unique and artistic touch to wooden surfaces, enhancing their appearance.
- Glass: Although hydro dipping on glass can be challenging due to its smooth and non-porous surface, it is still possible with proper surface preparation. Glass vases, mugs, and decorative items can be hydro dipped for a stunning visual effect.
- Ceramics: Ceramics, such as pottery, ceramic tiles, and decorative ceramic items are perfect for dup painting. The design can adhere to the surface, providing an interesting and personalized look.
- Fabrics: While hydro dipping is commonly used on hard surfaces, it is possible to apply it to fabrics like canvas shoes, clothing, and fabric accessories. It’s important to select fabric-friendly paints and ensure proper adhesion and durability.
It’s worth noting that different materials may require specific preparation methods to achieve optimal results. Proper surface cleaning, priming, and sealing may be necessary depending on the material.
What Items Cannot Be Hydro Dipped?
Hydro dipping can be applied to a wide range of material. However, there are some materials that are not suitable for this technique such as;
- Highly flexible materials: Materials that are extremely flexible or have a high degree of elasticity, such as rubber, silicone, and certain types of stretchy fabrics, are not be suitable for hydro dipping. The constant flexing and stretching of these materials can cause the paint to crack or peel off over time.
- Rough or textured surfaces: Hydro dipping works best on smooth and even surfaces. Materials with rough or highly textured surfaces, like certain types of unfinished ceramics, heavily textured plastics, or fabrics with a deep texture, may not allow the paint to spread evenly or adhere properly.
- Water-sensitive materials: Materials that are highly sensitive to water or can be damaged by moisture should be avoided for hydro dipping. This includes materials like paper, cardboard, certain types of untreated leather, and electronics. Water exposure can cause irreversible damage to these materials.
How Durable is Hydro Dipping ?
Hydro dipping has a long-lasting durability that can span over 5-10 years . The paint application method is known for its resistance to chipping and fading, ensuring a lasting result. With proper preparation and maintenance, hydro dipping can withstand high temperatures, UV light exposure, and maintain its strong adhesive qualities for an extended period.
Frequently Asked Questions
Should I sand before hydro dipping?
You should sand your object before hydro dipping. Sanding will smoothen out any edges to make it easy to for the paint to stick. You can use 80-100 grit sand paper
What kind of paint is used to hydro dip?
You can use acrylic paints for hydro dipping because they are easier to worth with. If you do not have acrylic paint, you can use marble paint, oil based paint, enamel paint or nail polish.
Do you need to rinse after hydro dipping?
You do not have to rinse after hydro dipping unless it is fabric. Apply a sealant after hydro dipping to give your object amore shinny exterior.
Do you need a base coat for hydro dipping?
You can apply a base coat or a primer to ensure that the paint adheres perfectly before you dip it into your water base.
Conclusion
There you have it guys. You can experiment with acrylic paint and be creative even with hydro dipping. Let me know in the comments section how it goes. Thanks for reading and love you all.